A lot of people are interested in plaster mouldings for walls. It is in fact a decorative element that allows to give a touch of elegance to a room without spending a fortune. Perfect for the contemporary classic style, plaster profiles and moldings have designs and styles that also adapt to the most modern and minimal contexts.
Below we show you in 4 simple steps how to best apply the plaster frames and obtain a perfect result!

1- Everything you need to know about plaster mouldings
Material: plaster!
Compared to other materials, the gypsum profiles are more rigid and robust and the individual gypsum pieces can be grouted together, completely eliminating the unsightly junction points.
In shops and premises open to the public, subject to stringent fire regulations, sometimes placing plaster frames and decorations is even the only solution, since plaster is a completely fireproof material.
The 3 main types of plaster mouldings for walls
Plaster cornices can be divided into “families” based on their use and function. The main ones are: crown cornices (or ceiling cornices), cornices for boiserie and panels, frames for LEDs and diffused light systems.
– Crown cornices or ceiling cornices: these are the frames that are applied in the corner where the wall and ceiling meet and are used to make the corner along the perimeter smoother
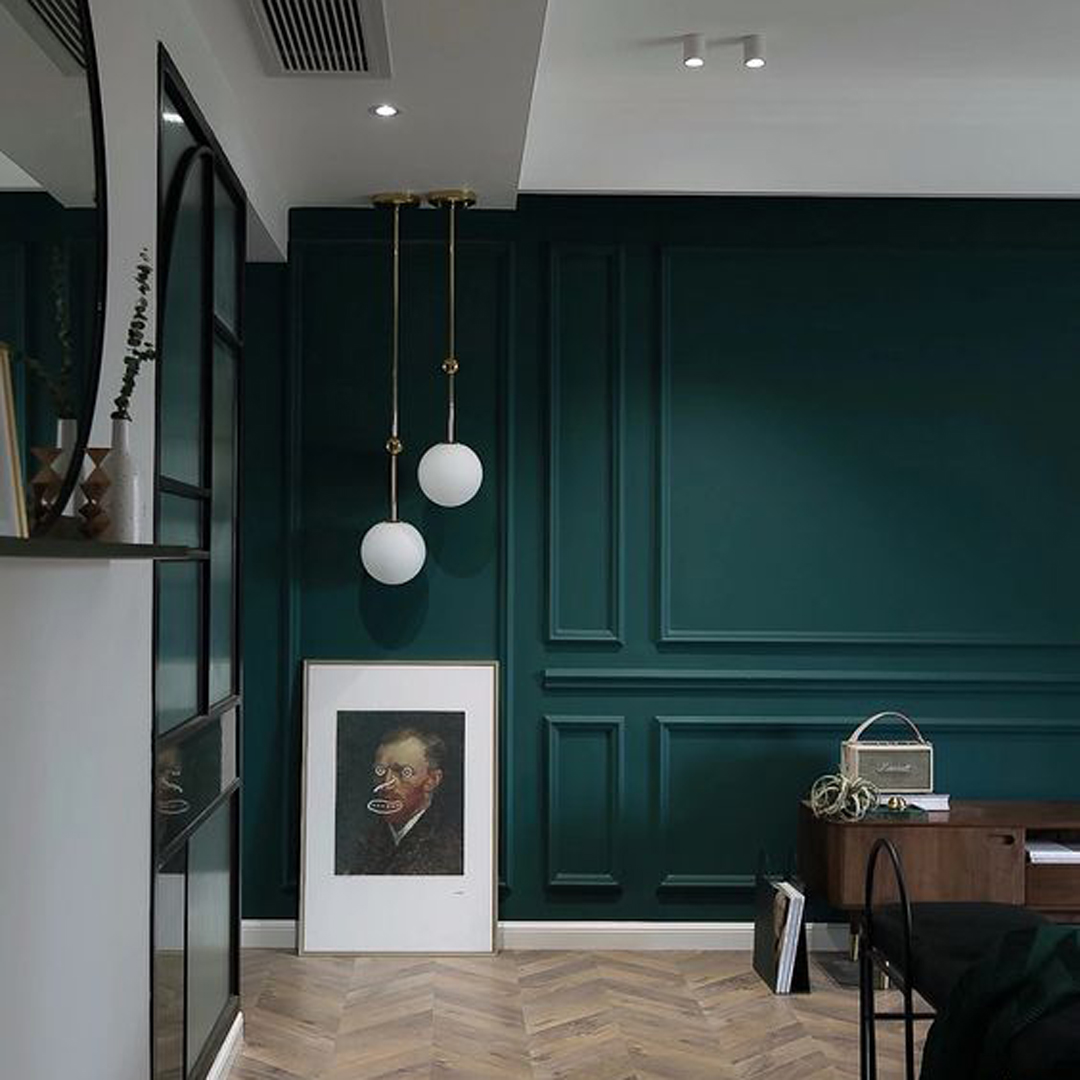
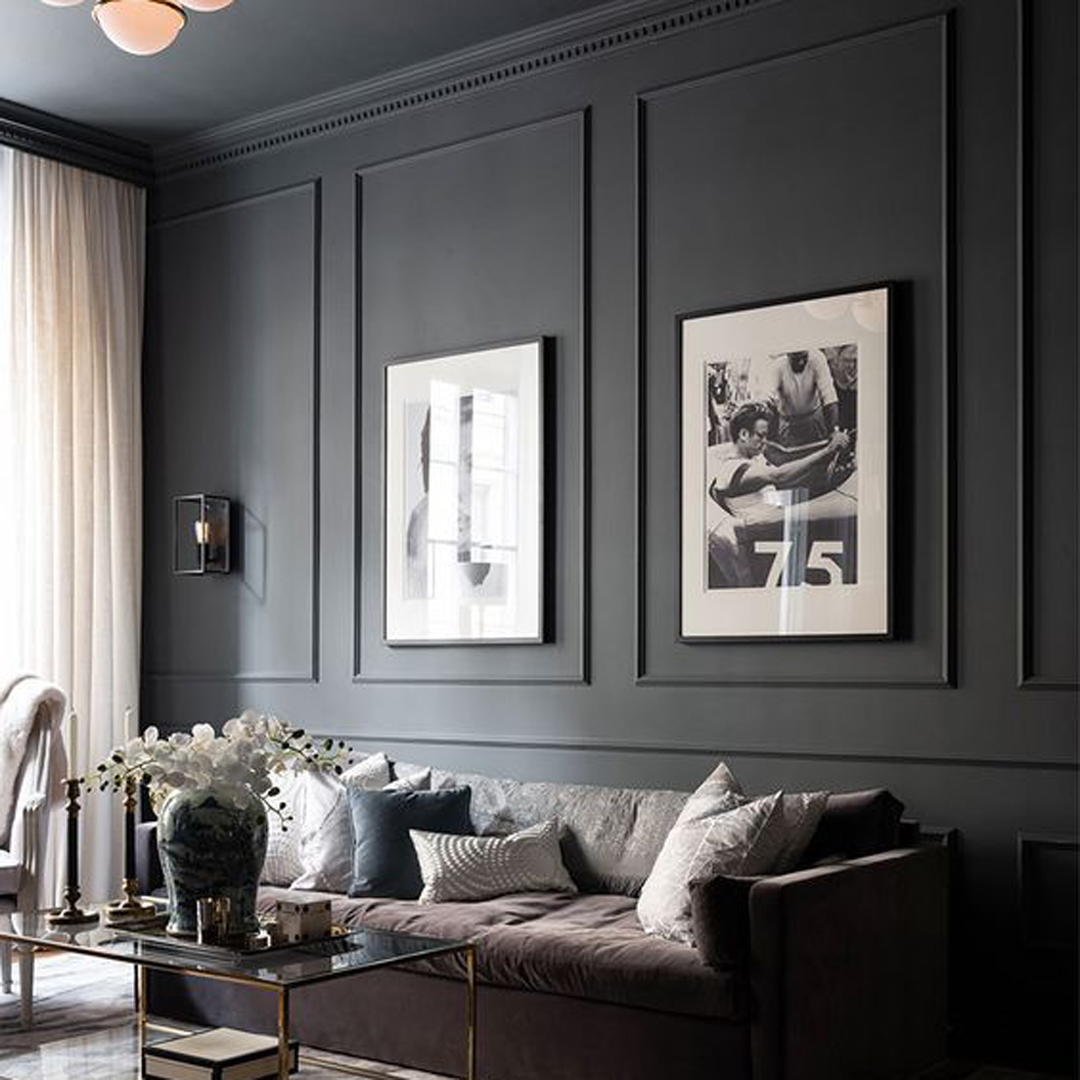
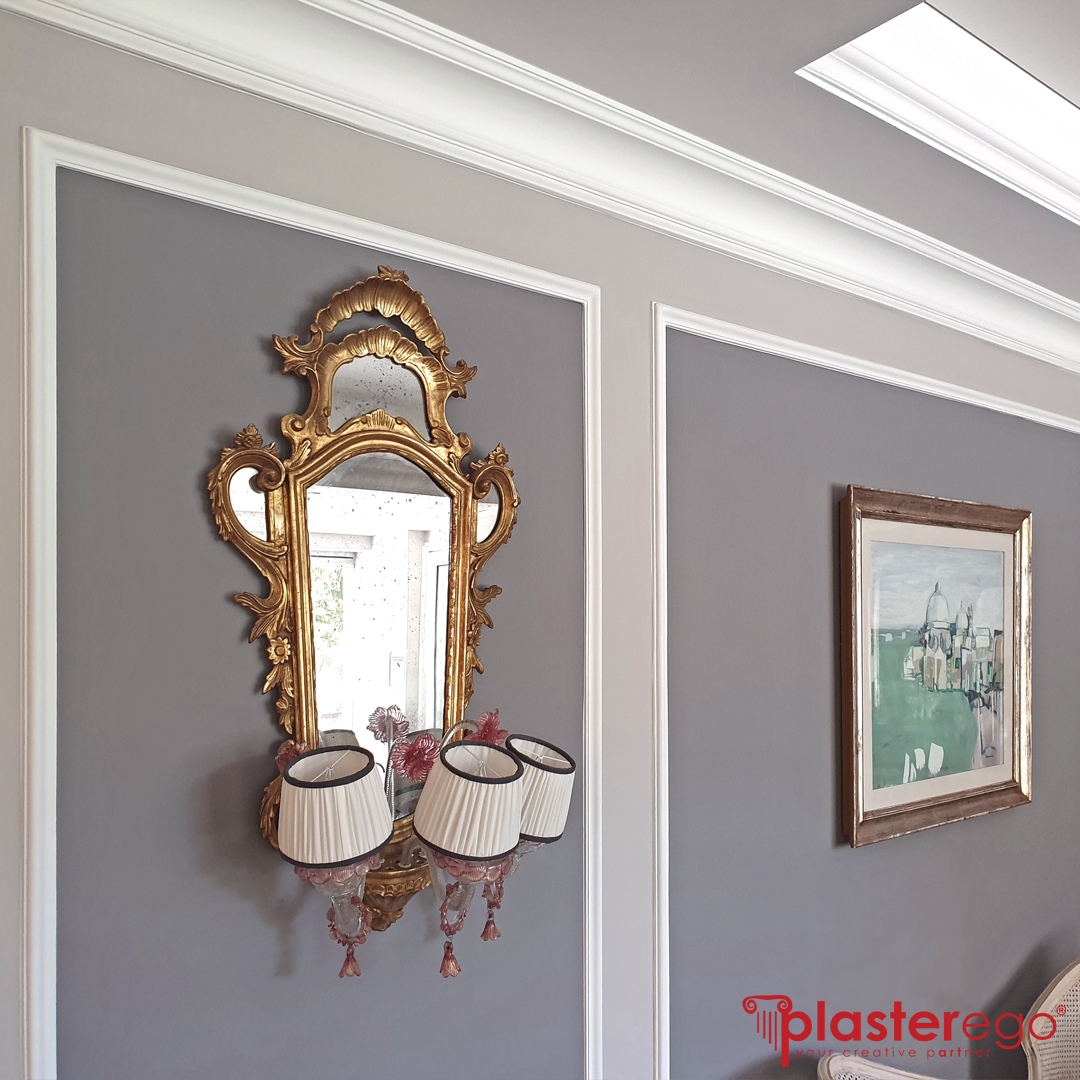
– Panel cornices are used to create ceiling squares, wall paneling and Boiserie
– The plaster frames for LEDs and diffused light systems have shapes specially designed to contain and hide the lighting systems and strip-LEDs from view. These plaster profiles are perfect for projecting a soft and diffused light onto a surface and/or room.
Dimensions, styles and decorations of the plaster frames
The offer available by visiting our gallery of plaster cornices is very wide, from classic and timeless cornices to modern plaster cornices. So which ones to choose?
The choice of the size and style of frame to use depends very much on the type of environment you want to create and on the furniture. In general, the sober and plain plaster cornices are good in any situation.
On the other hand, if you decide for a ornate decorations, it is recommended to standardize to the chosen style all the rooms in which the cornices are inserted.
And for the curved walls?
If you rely on professionals like us at Plasterego, there is a solution also for this need. In fact, we can create customized plaster frames for curved walls, made with a radius of curvature tailored to your needs!
2- The secret to planning a harmonious layout for plaster cornices: symmetry!
Beyond the formal rules codified over time on how to install plaster cornices, the “secret” is all here, respecting symmetry. The arrangement of the plaster frames, the distances between the panels and the boiserie, the interruptions, everything should ideally follow the rule of symmetry and in this way the result will certainly be pleasant and harmonious.
How to arrange the plaster mouldings
With crown cornices it is simple: they are installed along the entire perimeter of the room. But for panels and boiserie?
Easy, follow the rule of symmetry!
Within the single wall, the layout of the cornices must be symmetrical, regardless of whether you decide to create 2, 3 or more boiserie.
Is there a wall in the room that is the same as this newly arranged wall? Use the same layout for the latter as well. And so on for each rooms in which you will install the cornices.

Keep the distance constant
The distance of the frames from the edge of the wall, the distance between the individual panels, the distance of the panel from the ceiling frame: keep this distance constant and arrange the frames according to this constant measure to give a professional look.
Keep the distance costant even between all the rooms and plan your layout carefully before starting to install the frames!
Avoid interruptions
Try to avoid electrical outlets and other obstacles. Make sure that the plaster frames are not interrupted by anything. When arranging the frames, also take into account the windows, doors and vents of air diffusion systems, if any. Arrange the frames taking into account all the elements that could interrupt the linearity of the pose.
Pay attention to the squaring!
In case you have to opt for a DIY, pay attention to the square. There is nothing worse than dealing with crooked and off-axis frames.
Listen to this advice: if you are in trouble, use some paper tape to draw the boxes on your walls with it to instantly see how the frames would be there. A practical, simple and smart method!
3- How to install plaster mouldings
Tracing and preparation
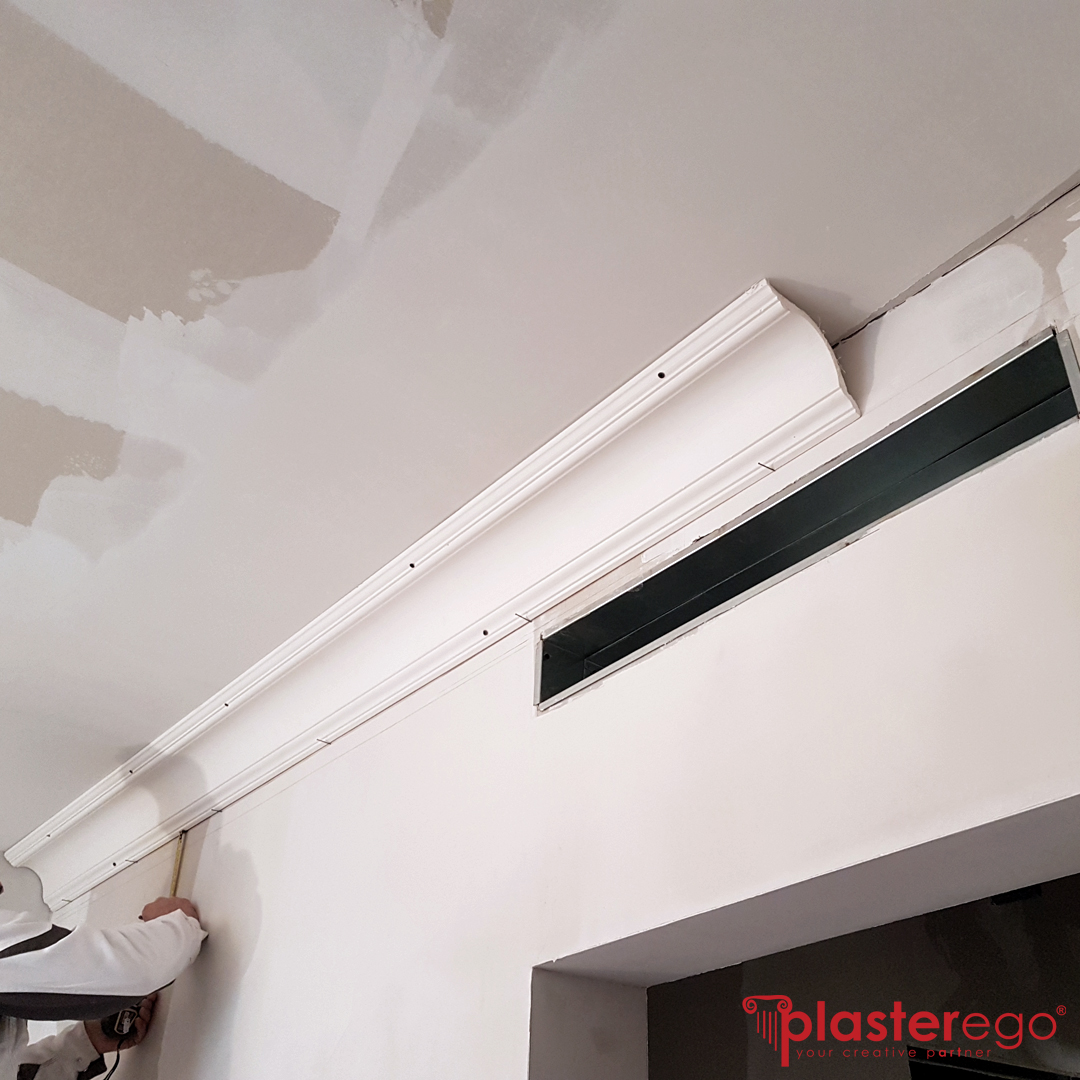
Before preparing the adhesive and start the installation, it is useful to trace the position of the individual frames. With the help of a pencil or a chalk line, trace the dimensions of the wall and ceiling frames. A simple trick to facilitate the installation of the plaster frames is to drive small nails at the mark drawn on the wall, and use them as a support on which to rest the cornices during installation and maintain the linearity of the frames.
How to cut plaster cornices
On several occasions, before gluing the frames, it will be necessary to make cuts to adapt the length of the plaster frames to the measurements or at the corners. In these cases, you can perform the cut with a simple handsaw or circular saw.
To make the cuts and edges on the corners, there are also simple (and cheap!) templates for hand saws on the market that allow to obtain a perfect result even for the less experienced!
Bonding and grouting plaster cornices
Plaster frames are applied with special glue directly on the smooth wall. However, for larger profiles it may also be necessary to use a mechanical anchor (eg screws and dowels).
The plaster cornices should be positioned on the appropriate marked area with the glue, making them adhere well to the surface, pressing with adequate force and performing small adjustment movements to the right and left. Any excess glue must be removed from the edges of the frames using a spatula and a brush wet with water.
Once glued, plaster cornices can be finished and grouted, using simple alabaster plaster and a small spatula. In this way it is possible to seal all the joints between the cornices and obtain a homogeneous and continuous result, without interruptions.
4- How to paint plaster cornices
Once the adhesive glue is dry, you can paint the plaster frames with a fixative primer and a water-based paint.
Compared to the color of the walls, the plaster cornices can be painted in the same tone, or in contrast, with completely different visual results. By painting the plaster frames it is possible not only to highlight the contrast between the adjacent surfaces, but also to mark the separation between two materials, for example between the plaster paneling and the wall.
Currently, the most popular solution involves the frames of the same color as the back wall. They are more elegant and refined and give a timeless look.